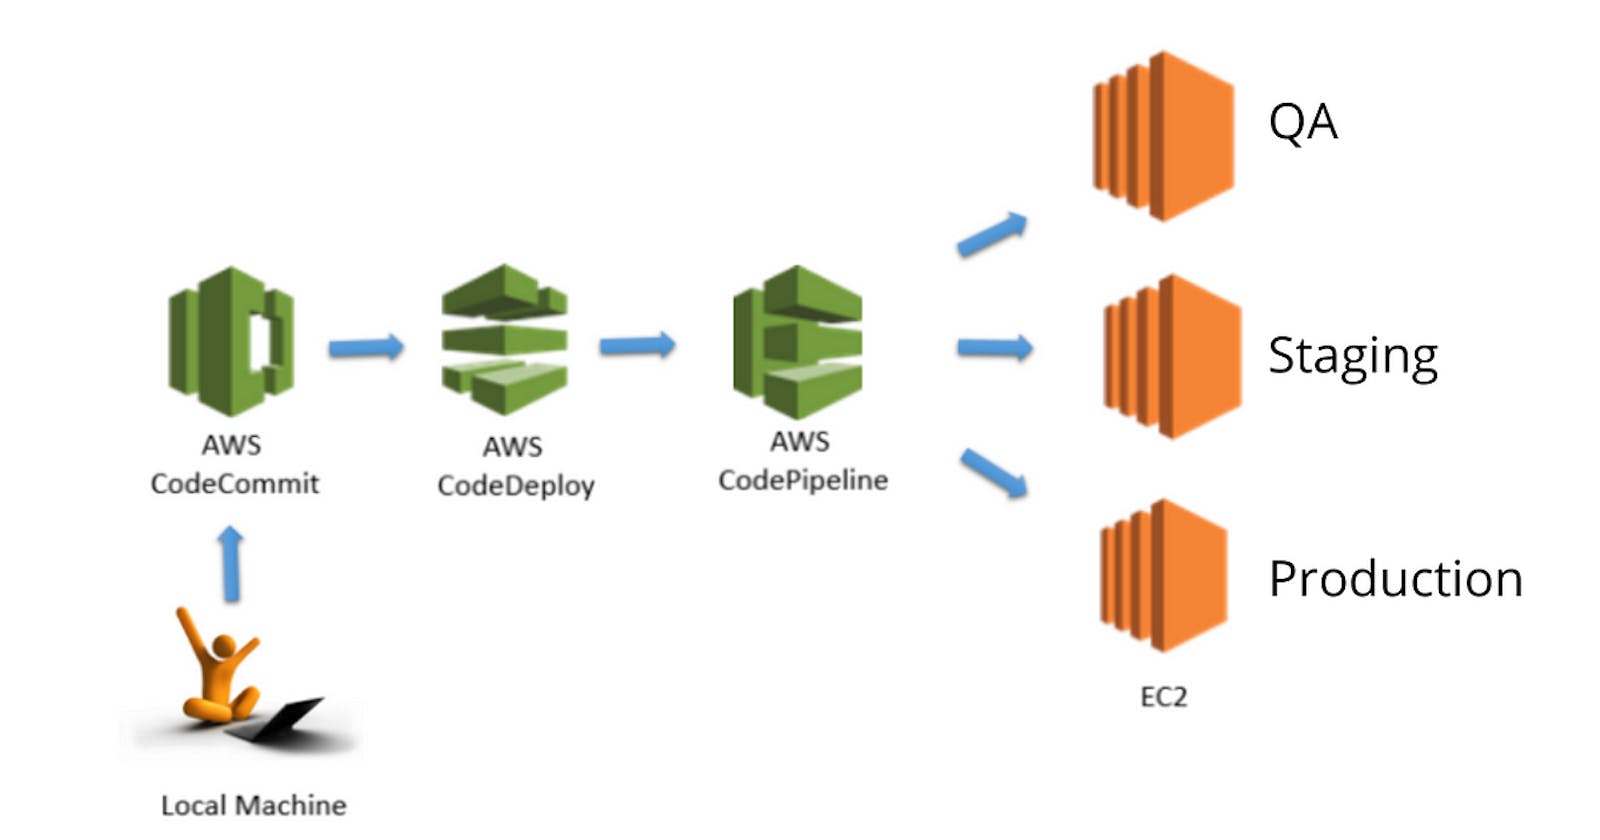
This is #90DaysofDevops challenge under the guidance of Shubham Londhe sir.
What is AWS CodePipeline?
- AWS CodePipeline is like having a super-smart assistant for your software development. It takes care of all the steps from building your code to testing it and then deploying it to users. This means you can deliver new features and fixes to your apps quickly and without any hiccups. CodePipeline lets you plan out exactly how you want your updates to happen and then handles everything automatically, so you can focus on making your software awesome.
Why Do We Need CodePipeline?
- CodePipeline is like your personal assistant for software development and deployment. Here's why it's so impressive:
Automation: Imagine having a helper who takes care of all those repetitive tasks like building, testing, and deploying code changes. CodePipeline does just that, saving time and reducing errors.
Consistency: With CodePipeline, you set up a standard way of releasing software. This means every release follows the same process, ensuring quality and reliability every time.
Visibility: Picture a roadmap showing exactly where your code changes are in the release process. CodePipeline gives you this visual representation, making it easy to track progress and collaborate effectively.
Scalability: No matter how big or complex your project is, CodePipeline can handle it. It grows with your application, supporting deployments of any size without breaking a sweat.
Integration: CodePipeline plays well with others. It seamlessly connects with other AWS services and external tools, so you can customize your release process to fit your needs perfectly.
- In a nutshell, CodePipeline streamlines your development and deployment workflow, making it smoother, faster, and more efficient. It's like having a supercharged engine for your software releases.
Real-Time Example: Using CodePipeline to Deploy a Web Application
- Here's a step-by-step breakdown of how a development team uses AWS CodePipeline to automate the deployment of a web application:
Source Stage: Team members work on the web app code together on GitHub. When someone makes changes and pushes them to GitHub, CodePipeline notices and starts the process.
Build Stage: CodePipeline grabs the latest code from GitHub and starts a build using AWS CodeBuild. CodeBuild compiles the code, runs tests, and bundles everything into a format ready for deployment.
Test Stage: Once the build is done, CodePipeline sends the app to a staging area. Here, automated tests are done, including checking if different parts of the app work together properly.
Review Stage: If the tests pass, CodePipeline waits for a human to give the green light. Team members review the changes and decide if they're good to go to the final stage.
Deploy Stage: With approval, CodePipeline moves the app to the production environment using AWS CodeDeploy. This step is done carefully to avoid any downtime or issues.
Monitor Stage: After deployment, CodePipeline keeps an eye on the app using AWS CloudWatch. It collects data to track how well the app is doing. If there are any problems, it alerts the team so they can fix them quickly.
By following these steps, the team can automate the release process, collaborate effectively, and ensure a smooth deployment of their web app.
In short, AWS CodePipeline helps teams automate and streamline the release of software by providing tools for building, testing, reviewing, deploying, and monitoring applications.
Create a simple index.html file in CodeCommit Repository
- let's break it down step by step:
Open AWS CodeCommit and Create Repository:
- Go to AWS CodeCommit and click on "Create repository".

- Simply click the create button without changing any settings.

Create IAM User and Set Permissions:
- Navigate to IAM (Identity and Access Management) and create a new user.

- Set the necessary permissions for the user.

- Go to the user's security credentials and generate HTTPS Git credentials for AWS CodeCommit.

- For detailed steps on creating a user, refer to an IAM Blog (Click here)
Setup Visual Studio Code and Create a File:
- Open Visual Studio Code and navigate to the desired folder.

- Create a new file for your project.

Use Integrated Terminal:
- Open the integrated terminal in Visual Studio Code.

Clone Repository from AWS CodeCommit:
- Go back to AWS CodeCommit and find the HTTPS clone URL for your repository.

- Copy the clone URL and paste it into Visual Studio Code.

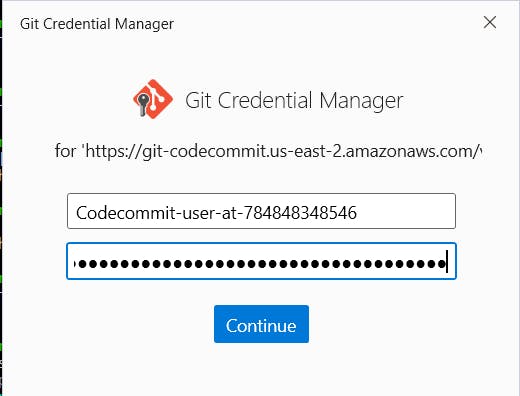
- Provide the HTTPS Git credentials when prompted.

Initialize and Check Branches:
- Initialize the repository and check which branch you are on.

Add Changes to Staging Area:
- Since you have a master branch, add the index.html file to the staging area using the add command.

Commit Changes with Message:
- Commit the changes with a descriptive message.

Push Changes to CodeCommit:
- Push the committed changes to AWS CodeCommit.

Verify Changes in CodeCommit:
- Go back to AWS CodeCommit and refresh the service to see the index.html file.

By following these steps, you can effectively manage your code using AWS CodeCommit and Visual Studio Code.
Build the index.html using nginx server
Set Up Nginx Server with index.html:
- First, build your index.html website using Nginx server.
Create Build Project in CodeBuild:
- Navigate to the CodeBuild service and click on "Create Project".

- Simply click "Create build project" without making any changes.

No need to change anything just click create build project.

Create buildspec.yml File:
- Create a buildspec.yml file and push it to CodeCommit.
Buildspec.yml file:
    version: 0.2
    os: linux

    phases:
      install:
        commands:
          - echo "Installing NGINX"
          - sudo apt-get update -y
          - sudo apt-get install -y nginx

      build:
        commands:
          - echo "Build started on $(date)"
          - cp index.html /var/www/html/

      post_build:
        commands:
          - echo "Configuring NGINX"

    artifacts:
      files:
        - /var/www/html/index.html

- The buildspec.yml file contains instructions for building your project.

Start Build Process:
- Go to CodeBuild service and initiate the build process.

Verify Build Success:
- Ensure that the build process is successful.

Create S3 Bucket:
- Create a new bucket in Amazon S3 to store your artifacts.

For detailed steps on creating a bucket, refer to a provided blog.
Create Folder and Obtain URL:
- Inside the S3 bucket, create a folder and copy its URL.

Configure Artifacts Upload Location:
- In the CodeBuild project settings, edit the artifacts upload location.

- Paste the URL of the folder in the S3 bucket.

Upload Artifacts:
- Click on "Update project" without making any changes.


View Artifacts in S3 Bucket:
- After the upload is complete, view the artifacts in the S3 bucket.

Appspec.yaml file for CodeDeploy:
1. Understand the Purpose of appspec.yaml
Deployment Instructions: It tells CodeDeploy how to deploy your app, detailing actions before, during, and after deployment.
Lifecycle Hooks: Defines custom actions at various deployment stages for control and customization.
Version Control: Tracks changes in deployment instructions, aiding in collaboration and consistency.
Standardization: Ensures consistent deployment configurations across various applications and environments.
Ease of Use: Centralizes deployment configurations, simplifying management and troubleshooting.
In summary, the appspec.yaml file is essential for AWS CodeDeploy because it defines deployment instructions, lifecycle hooks, version control, standardization, and ease of use, all of which are crucial for orchestrating successful deployments of your application.
2. Create the appspec.yaml File
Here’s a template for deploying a simple web application to an EC2 instance:
  version: 0.0
  os: linux
  files:
    - source: /
      destination: /var/www/html
  hooks:
    AfterInstall:
      - location: scripts/install_nginx.sh
        timeout: 300
        runas: root
    ApplicationStart:
      - location: scripts/start_nginx.sh
        timeout: 300
        runas: root
3. Write the Scripts
install_nginx.sh
  #!/bin/bash
  sudo apt-get update
  sudo apt-get install -y nginx
start_nginx.sh
  #!/bin/bash
  sudo systemctl start nginx
  sudo systemctl enable nginx
4. Deploy with AWS CodeDeploy
- Upload your application and the
appspec.yamlfile to an S3 bucket or GitHub repository connected to CodeDeploy.

- Create a deployment group in CodeDeploy, specifying your deployment preferences, such as the deployment method and the environment configuration.
5. Use AWS CodeCommit
- Push your changes, including the
appspec.yamland scripts, to an AWS CodeCommit repository to maintain version control.


6. Build with AWS CodeBuild
- In the AWS CodeBuild console, click the "Start build" button. This action compiles your code, runs tests, and produces artifacts ready for deployment.

- Now build is done.

- After the build completes, go to the S3 Bucket to ensure all artifacts are correctly stored and ready for deployment.
Create a EC2 Machine:
To create an EC2 machine, follow these simple steps:
Once there, locate the option to create a new EC2 instance.
Click on the "Create Instance" button or similar.
You'll be guided through a series of setup steps where you can choose the specifications for your EC2 machine, such as its instance type, storage, and network settings.
Once you've configured your EC2 instance to your liking, proceed to the next steps and confirm your selections.

Now that you have your aws-demo-app-sever EC2 machine set up, let's connect to it:
- You'll need to install the Nginx web server and the CodeDeploy agent on your EC2 machine.

To do this, we'll create and run a shell script named
install.sh.Here's the content of the
install.shscript:
    #!/bin/bash
    # This installs the CodeDeploy agent and its prerequisites on Ubuntu 22.04.
    sudo apt-get update
    sudo apt-get install ruby-full ruby-webrick wget -y
    cd /tmp
    wget https://aws-codedeploy-us-east-1.s3.us-east-1.amazonaws.com/releases/codedeploy-agent_1.3.2-1902_all.deb
    mkdir codedeploy-agent_1.3.2-1902_ubuntu22
    dpkg-deb -R codedeploy-agent_1.3.2-1902_all.deb codedeploy-agent_1.3.2-1902_ubuntu22
    sed 's/Depends:.*/Depends:ruby3.0/' -i ./codedeploy-agent_1.3.2-1902_ubuntu22/DEBIAN/control
    dpkg-deb -b codedeploy-agent_1.3.2-1902_ubuntu22/
    sudo dpkg -i codedeploy-agent_1.3.2-1902_ubuntu22.deb
    systemctl list-units --type=service | grep codedeploy
    sudo service codedeploy-agent status

- After that run this file using bash command

Codedeploy service (Deploy the file):
To use the CodeDeploy service to deploy files, follow these simple steps:
Open CodeDeploy and click "Get Started."


- Next, click "Create Deployment Group."

- Go to IAM and create a role.

- Attach the necessary policies to the role.

- Go back to CodeDeploy and assign the newly created role.


- Click "Create Deployment Group" without making any changes.

- Everything is now set up correctly.

- Create a role and assign it to the EC2 machine.

- Go to the EC2 machine, click "Actions," then "Modify Role."

- Create a new role, then click "Create Role."


- You now have the EC2-CodeDeploy role.

- Click "Update Role" and restart Nginx if needed.

- Return to CodeDeploy and click "Create Deployment."

- Without changing anything, click "Create."

- Development is complete. Copy the instance's public IP and paste it into another browser.

That's it! You've successfully deployed your files using CodeDeploy.
Conclusion:
AWS CodePipeline is a powerful tool that streamlines software development processes, from code building to deployment. With its automation capabilities, CodePipeline simplifies tasks, ensures consistency, and enhances efficiency in the release cycle. By leveraging CodePipeline, teams can deliver updates quickly and reliably, ultimately improving the overall development workflow and end-user experience.
